Construction of the Red Stretcher
 This will be a non-adjustable stretcher. It doesn’t allow further adjusting of canvas tension as with commercially-made stretcher bars, which have corner slots that aren’t glued, along with pegs which you hammer into these slots to take up slack. However, in making scores of stretchers I’ve never had to go back and adjust canvas tension. Making your own stretcher is much less expensive and allows you to make any size canvas you like.
 I’m starting with four 48″ and four 30″ lengths, all 1″ x 2″ boards. Because of the overlap technique described below, the final stretcher will actually come out to 49½” x 31½”. Of course I could have cut to 46½” and 28½” if I’d wanted an exactly 48″ x 30″ stretcher.
I’m using red-painted boards that came from a table I built and eventually dismantled. Not only were these eight red boards nice and straight, I figured the color would be good for a photo demonstration. However, I normally use new, unpainted wood for better glue adhesion. Some of the photos show where I scraped and sanded the surface for better gluing.
Shown are most of the supplies listed in Appendix 1, plus a 1″ x 2″ board for a cross brace, and the two 8′ lengths of half-inch quarter-round finishing shoe that will be cut into four pieces for raising the canvas surface.
Building the Stretcher
Cut eight sections of 1″ x 2″ boards to desired lengths.
 Make each side by staggering one board over another to leave a gap at the end, which will be the same width as the board–1½”, but note I use one of the red boards (on the right) to measure the correct width. Make sure the boards are evenly lined up, then glue and nail them with 1¼” finishing nails. I use about 1 nail per foot.
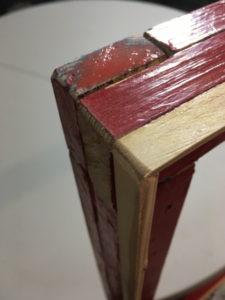
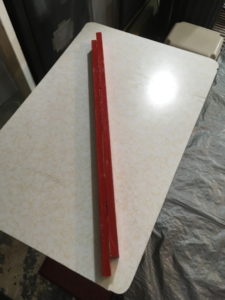 This is one finished side. Note the overlap. The glue is where the stretcher gets its strength. Nails serve to hold the wood together until the glue dries.
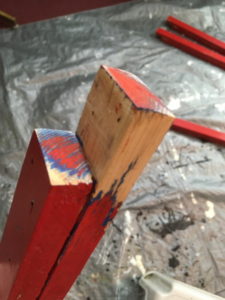 I sanded connecting sides down as best I could for better gluing. Normally you wouldn’t have to do this.
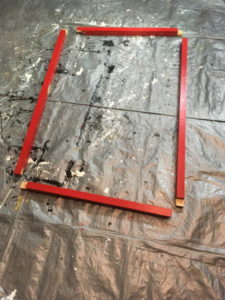 Arrange four sides in a rectangle and note how they’ll fit together, each overlapping top board corner nestling into the next side’s corner.
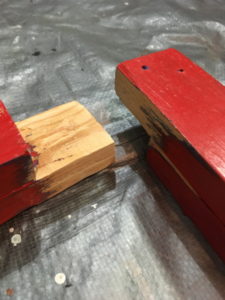 Do one corner at a time, gluing all surfaces and, for now, putting just 1 nail in each corner.
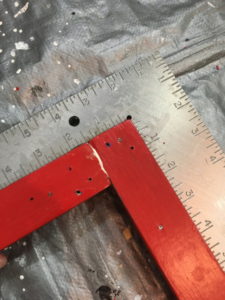 Use a square to check for 90° at each corner. Once all four corners are glued, with 1 nail in each (note there is really only 1 nailed in in this photo), the entire stretcher can be wiggled slightly against the square to get four true 90° angles. Do this before the glue dries; you have a few minutes.
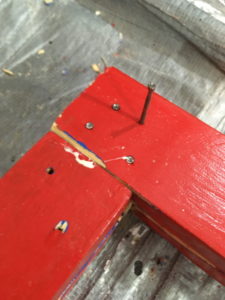 Once you have a perfect square, go ahead and put at least three more nails in each corner.
Also check that the entire stretcher is flat, that is, all four corners lying evenly on a flat surface. They should be, unless your original wood is seriously warped. In that case I would chalk all this up as a learning experience because it’s probably time to start all over again with better wood! But before the glue dries it may be possible to twist the corners a bit, then weight the corners with bricks on a truly flat surface until the glue dries, thus resurrecting real flatness. I had to do that once.
Cross Brace (Optional, Depending on Stretcher Size)
I used one cross brace for this size; it may or may not be necessary, but it’s possible that stretching canvas on the long side might warp the stretcher inward.
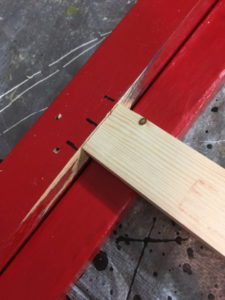
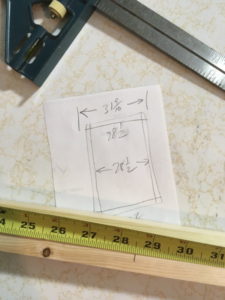 Turn the stretcher upside down, so that the side where you hammered nails is now facing down. It’s important that the cross brace is affixed on the reverse side of the stretcher, not the front side where painting pressure may force the canvas against this cross bar.
Calculate the exact middle is of the sides to be braced, in this case half of 49½”, or 24¾”. Then measure the width to be bridged between these middle points. Here the interior gap is 28½” and I cut a 1″ x 2″ board to this length.
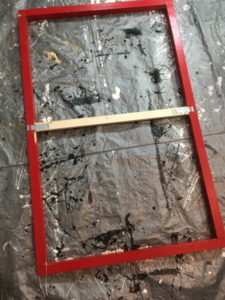 When affixing the cross brace, support it with other 1″ x 2″ boards underneath it as shown. (Again note my scraped paint area.)
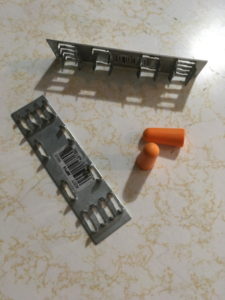
Glue the ends and then nail in the wicked-looking mending plates. I use ear plugs because the sound this hammering makes is extremely loud and high-pitched.
Again notice that the cross brace is affixed to the back of the stretcher, not the front where the quarter-inch strips are now ready to make their appearance.
Making the Raised Surface for the Canvas
The painting surface of the canvas, once wrapped around the stretcher , will only touch the stretcher along the four lines of the top part of the quarter-round finishing strips.
 Flip the stretcher again to have the cross brace down, touching the floor, and the original nailed surface up.
Cut a left 45° angle on all four quarter-round strips, either now or as you go along. You’ll nail a quarter-round strip to each of the four edges of the stretcher, with left and right cuts to each one.
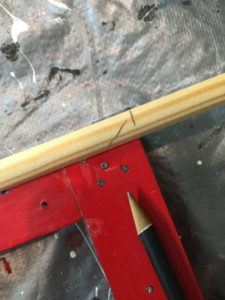
On the first side, place a left-cut strip flush with the outer side of the stretcher, flat surface outward, the curved side facing in. Align the left 45° angle to the extreme left corner, hold the strip tightly to the stretcher and at the far right edge, note with a pencil how long the strip needs to be to cover the entire length.
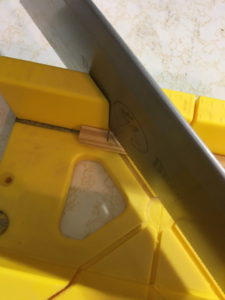
Remove the strip, place it in the miter box, and cut a right 45° angle at the pencil mark.
Glue this strip and nail it with 1″ finishing nails to the stretcher, about 1 nail per foot. I usually start by putting the strip on the floor and making two starter nails at each end, so when I’m doing the final gluing and nailing I’m not having to hold a loose strip in place while trying to start a nail.
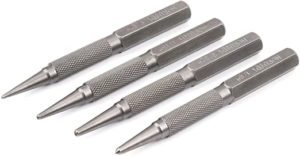
Sometimes it’s difficult to nail straight down on this curved surface. I often only nail just enough to secure the strip in place and then make sure all the nails can be further hammered correctly, or if they need to be pulled to start over. A nail punch can be used to definitively sink the nails below the top ridge of the strip; you don’t want these nail heads to be able to touch the stretched canvas.
It’s also okay to leave lots of unsightly holes if nails don’t work in a specific place. All this is going to be covered up by canvas.
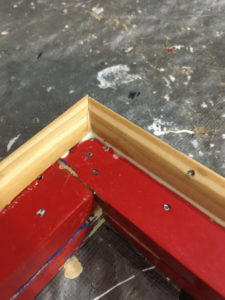 Get Strip #2, place its left 45° angle into the nailed-down right 45° angle of Strip #1, then repeat the measuring and nailing steps. Repeat for the remaining two strips. The last one will be slightly different in that you’re measuring for your right 45° cut not on blank wood, but on the raised surface of Strip # 1 already nailed into place. So make you best estimate of where the cut should be. If you wind up with a small gap, that’s okay. Wood filler can be used to fill this in.
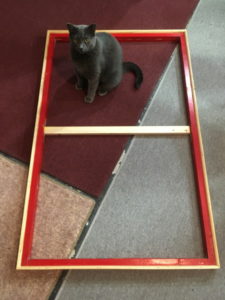 Let the entire assembly dry for a whole day before stretching canvas on it.
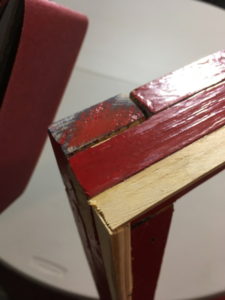
When the glue has dried I sand the corners to remove sharp edges for the stretched canvas. No reason to put additional pressure points on the canvas, and the sanding effect isn’t noticeable once the canvas is stretched.
Appendix 1. Supplies
- 1″ x 2″ boards. You’ll wind up with eight total pieces, two boards per side. For larger canvases you may need a couple more for one or more cross braces. Note also that the real dimensions of any 1″ x 2″ board are, for reasons unknown, actually ¾” by 1½”. When buying, sight down the sides of each to check for warpage. Get as straight ones as possible. Minor defects or knotholes aren’t terribly important because the finished stretcher should essentially cancel out these defects. It doesn’t matter how the final thing looks as long as it’s square and flat; it will be covered by canvas.
- ½” or ¾” quarter-round strips. Cross section:
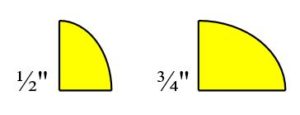 These are the finishing strips (or “shoes”) you see along baseboards; the three-quarter-inch ones are a little easier to nail. You can buy in various lengths and calculate what you need, but you’ll wind up with four strips, each at least a couple inches longer than the sides they’ll be installed on, so that you have room to cut your 45° angles.
- Finishing nails: 1¼” for the 1″ x 2″ boards, and 1″ for the quarter-round strips
- Wood glue
- For cross braces: mending plates about 1″ wide.
- Optional: wood filler to smooth out various holes, cracks, etc. Not really necessary unless there’s a serious gap that might affect how the canvas is stretched over it.
Appendix 2. Tools
- Saw, hacksaw. A regular saw will do the 1″ x 2” boards but you probably need a hacksaw for the quarter-round strips.
- Hammer
- Miter box–or the ability to eyeball and cut perfect 45° angles on a curved surface
- Tape measure and pencil.
- Square for checking right angles.
- Sandpaper
- Useful: nail punch for making sure nails don’t protrude above the quarter-inch round sections.
copyright 2020 by Michael D. Smith

Comments
Construction of the Red Stretcher — No Comments
HTML tags allowed in your comment: <a href="" title=""> <abbr title=""> <acronym title=""> <b> <blockquote cite=""> <cite> <code> <del datetime=""> <em> <i> <q cite=""> <s> <strike> <strong>