Stretching the Canvas
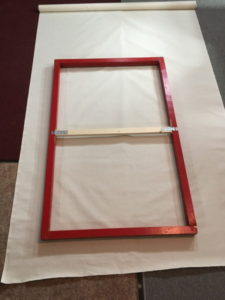 This almost has to be demonstrated in person before it makes sense, but I’m giving it a verbal try here.
First, vacuum the floor to get up items like cat hair. Unroll the canvas on the floor.
Place the completed stretcher (here showing my recently completed 49½” x 31½” red stretcher) upside down on the canvas, only the tips of the quarter round finishing strips touching the canvas.
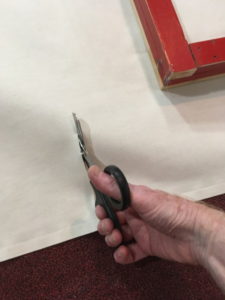 Use scissors (the kind of craft scissors that can cut through rough cloth like burlap work great) to cut the canvas so that the overhang on all four sides is more or less the same, at least five inches on all sides.
D uring the following procedure keep straightening the canvas under the stretcher as you go along. The goal is to work from the centers of the four sides to the four corners.
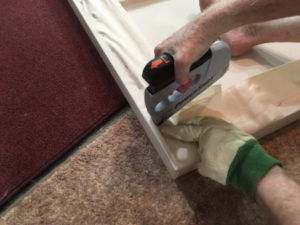
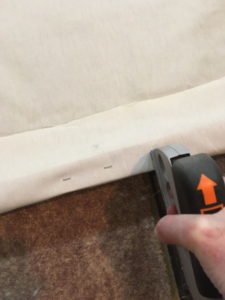 On the middle of one side, wrap canvas around to the back of the stretcher, tauten it minimally, and place 3 or 4 staples a couple inches apart on the reverse surface (NOT on the side of the stretcher).
 Go to either the right or left side from this original stapling and repeat this minimal tautening process. Don’t go to the opposite side yet. Now you have two sides stapled only in the middle, at right angles to each other.
The “full tension” stretching takes place on the two sides opposite these first two sides. Get in the middle of an “opposite” side and pull the canvas toward you almost as hard as you can. You’ll develop a feel for this: it is possible to do this in excess and rip a low-grade canvas. You might also bow the stretcher bars inward, but this usually happens on larger than 3 foot by 3 foot stretchers and on stretchers without cross braces.
Garden gloves are useful, as you can get slight canvas burns from pulling. Commercial pullers are also available. I usually get my feet on the stretcher bar and push it away as I pull the canvas towards me. Then deliver three or four staples to hold the canvas in place.
Repeat this process on the opposite side.
The above step more or less established how tight this canvas is going to be. The process of stretching always starts in the middle and works to the corners. If you’re doing something larger than 3 feet by 3 feet, you’ll probably want to establish another matched set of preliminary tautened side, then fully tautened opposite side, to all sides needing it, working your way to the corners.
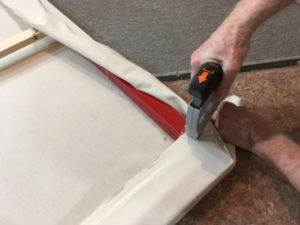 Each corner is dealt with one a time. This is how I do but, but you may invent your own technique. First I pull the loose canvas to a right corner, tauten it and staple it in place.
Then at the other side of the corner I pull the remaining loose canvas to the left, tauten it, wrap it over the corner, tighten that, and staple it. It takes a couple times to get the hang of it.
 You can either do the left or right side of the corner first, but I always do mine the same way, first moving right towards a corner, then going to the other side of the corner and pulling the canvas to the left to do the final wrap, because my hands have memorized those motions.
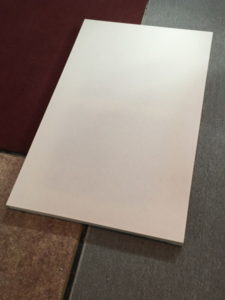 Turn the canvas over so that the painting surface faces upward. I was told in my first painting class at Rice that a quarter tossed on it should bounce. There should be a certain amount of give. The goal is “taut,” not “overtightened.”
Check for ripples in the canvas which may occur along the edges. If there are any, you can remove staples with a staple remover and try retightening the canvas at that spot and. The first few times you do this you may need to redo a whole side. You can always remove all staples and just start over.
Preparing the Canvas for Painting
Use a handheld vacuum on the canvas surface or find some other method for removing the cat hair unless you want to integrate this and other floor debris into your painting.
Gesso the canvas. Gesso is a ground incorporating paint pigment, chalk, and binder. It isn’t needed for pre-primed canvas, which is already coated with gesso. Gesso provides the color surface (usually white, though you can buy colored gesso) upon which your paint will be applied. Since oil and acrylics are not entirely opaque, the gesso ground has an effect on the colors. One layer of gesso will work, but you’ll notice you’ll get a much brighter white by using two coats. Gessoing is also a good psychological preparation for getting into the painting.
Appendix 1. Supplies and Tools
- Canvas roll. You can buy from dickblick.com or danielsmith.com, to name a couple art supply outlets. The longer the roll, the more expensive. You’ll see a wide variety of quality. I use unprimed duck, medium weight. Though prices seem expensive, you might get six paintings out of one roll. Ungessoed canvas is much easier to stretch and less expensive.
- Scissors
- Garden gloves to avoid canvas burns
- Staple gun and staple remover
- Gesso. Overview at https://www.dickblick.com/categories/canvas/primers/
copyright 2020 by Michael D. Smith

Comments
Stretching the Canvas — No Comments
HTML tags allowed in your comment: <a href="" title=""> <abbr title=""> <acronym title=""> <b> <blockquote cite=""> <cite> <code> <del datetime=""> <em> <i> <q cite=""> <s> <strike> <strong>